- Using non-destructive X-RAY inspection, observe the lead wire of the failed product and the lead wire of the good product to be connected to the tin surface and magnify the comparison, and find that the lead wire of the failed product to be connected to the tin surface is more shifted than that of the lead wire of the good product to be connected to the tin surface.

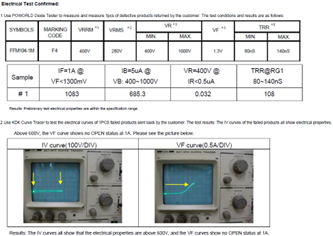
- Electrical testing: Through dedicated testers and curve tracers, respectively, to differentiate the normal electrical test and Hi-VF differences, to research and simulate the OPEN problem source characteristics, to carry out 1~3 times the forward current test verification comparison, to determine the range of anomalies.
- Compare the gap between the lead wires and tin surface of the failed product and the good product through cross-section analysis of the parts.

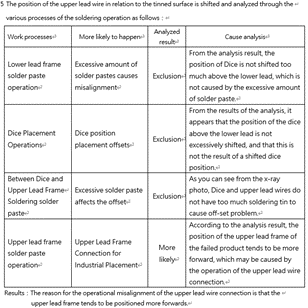
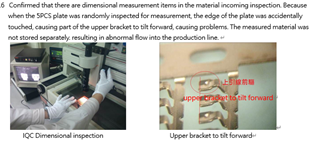
- Identify the factors that may cause the gap between the upper lead wire and the tin surface to be small during the welding process through the failure mode discussion layer, and correct the omission.
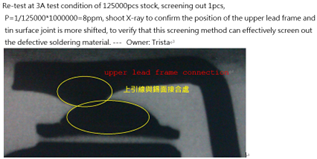
- Simultaneously use the downward pressure drop slope measurement method to monitor the difference between the upper lead and the tin surface joint gap that may be small due to thermal expansion under high temperature, and the stock 125K is effectively screened out by 8 DPPM through this test program.
- Inheriting our measurement equipment and core team, we can effectively reduce the market failure to less than 2DPPM close to zero, to satisfactorily solve the customer's market anomaly and analysis and improvement.

